Last week, I talked about how easy it can be to assess your own movement patterns to determine what exercises are appropriate for your body. Not only did I mention how easy it is, but how extremely important as well.
An assessment can provide a map of sorts. It gives direction and a framework on how to go about designing a program. But after you’ve completed the assessment, how do you go about improving the way your body moves?
That’s what I want to tackle in this article.
As I mentioned in my last post, everyone’s body is unique. Movement isn’t always the same across the board. Some may squat better, while others have no trouble performing overhead exercises.
Even though movement can differ, the great thing is anyone can improve that way their body moves with a little bit of effort. So, let’s go back through our assessment tests and look at how we do that.
1. Back To Wall Shoulder Flexion/Apley’s Scratch Test
These two tests are all about assessing the ability to get the arms overhead safely and efficiently. If you failed these tests, the biggest areas you need to focus on are shoulder and thoracic mobility.
Mobility essentially is the capability to produce a desired movement. When looking at the shoulder and thoracic area, to move better, you need to focus on two key movements: extension and rotation.
Poor shoulder and thoracic mobility is usually associated with a rounded upper back, so opposite movements (i.e. extension/rotation) are needed to begin to improve these movement patterns. Here are two exercises you can use to begin working on this.
a. Thoracic Extension Over A Foam Roller
As the name implies, this exercise focuses on the extension aspect. And it’s simple to do.
Here’s how to perform it:
- Lie down on a foam roller, with the roller sitting right below the shoulder blades. Place your hands on the back of your hand, and brace your abs hard as if someone was about to punch you in the stomach.
- Bracing is a key component here. If you do not brace your abs, you will obtain all the movement through the lower back which is the opposite of what you want.
- Once you are braced, inhale, then exhale and rock over the foam roller until you have gone as far as you can. Come back to the starting point, and repeat. You should notice you’ll be able to rock a little bit further over the foam roller each time.
- Perform for 10-12 breaths

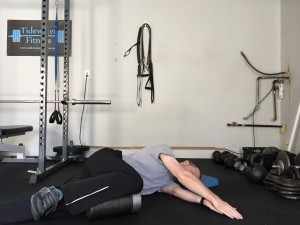
b. Sidelying Windmill
This exercise is more dynamic, in that, it will encompass both extension and rotation.
Here’s how to perform it:
- Lie down on your side, with your head supported by a pad, and your top leg supported by a foam roller. The hands will be directly on top of each other.
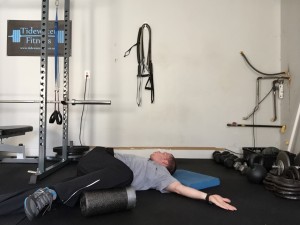
- From here, reach forward with your top hand and sweep that hand up in the shape of a half circle. Try to keep the hand as close as you can to the floor while doing this and do not let the knee come off the foam roller. Also be sure to follow the hand with your eyes.
- Once you have completed the half circle, bring your hand back to the starting position and repeat.
- Perform for 6-8 reps on each side.

2. Quadruped Rock Back
This test measured your squat mobility. Butt wink (low back rounding at the bottom of squat) is a pretty common occurrence. While this test assesses mobility, to improve it, the focus needs to be on improving core stability.
Working with my clients, I have found that when you improve the ability to engage the core musculature in the squat, you tend to fix most butt winking issues. Here are two exercises you can use to do this.
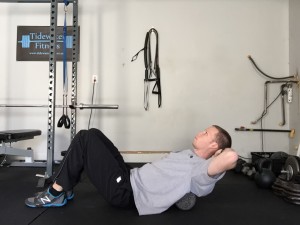
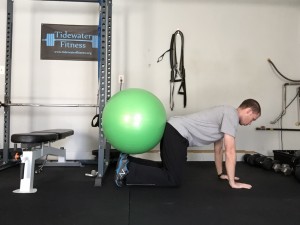
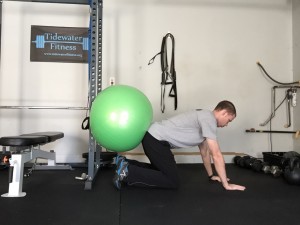
a. Rock To Ball
This test, like the assessment, uses the floor to provide some stability. But the reason this exercise works is because it teaches you to engage your abs as you lower down into a squat, which is when butt wink occurs.
Here’s how to perform it:
- Set up in a quadruped position against a wall with a stability ball against your butt and your legs underneath.
- From here, push into the ball. At this point, you will feel the ball pushing you away and your abs will engage to keep you from moving.
- While holding this position, take 10-12 breaths.
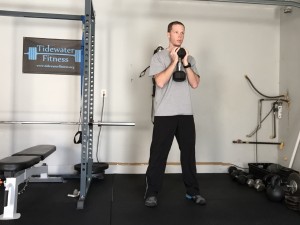
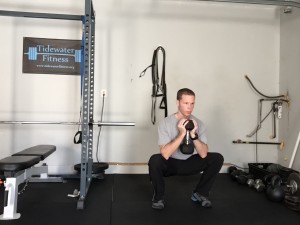
b. Goblet Squat
The goblet squat was created by strength coach Dan John. It is without a doubt one of the best tools for improving the squat.
The reason this exercise works so well is because the weight you’re holding in front of you automatically gets you to engage your abs without you having to think about it. As you lower down into a squat, this provides the stability your body needs to perform the correct pattern.
Here’s how to perform it:
- Grab a kettlebell or dumbbell and hold it directly in front of your chest.
- Using the squat position you found in the previous article, push your hips back and squat down between your legs.
- Keeping the back flat and chest up, drive through the heels and return back to the start.
- Perform 8-12 reps.
3. Straight Leg Raise
This test measured the ability to move the hips, while maintaining core control. As I mentioned, it is an important part of the hip hinge pattern. To improve it, the focus needs to be on two areas: moving the hips while maintaining core stability and lengthening the hamstrings.
Moving the hips while maintain core control and increased hamstring length will improve the ability to perform the hip hinge pattern properly without compensating at the low back. Here are two exercises you can use to accomplish this.
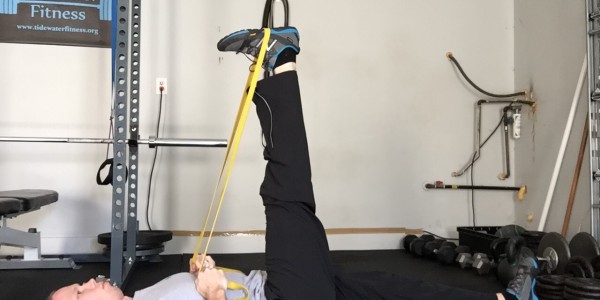
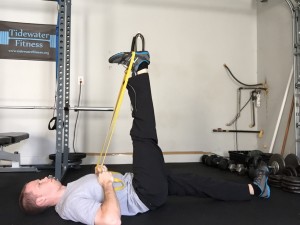
a. Leg Lowering With A Band
One of the reasons people struggle on the leg raise test, is that it takes tremendous stability to control the leg as you move it. Without that stability, the leg won’t move very far. This exercise provides that stability, so you can accurately perform the movement.
Here’s how to perform it:
- Lie down on your back with both legs up in the air. Using a band, place the bottom of one foot against the inside of the band and pull. This will straighten your leg and place tension on the back of the thigh.
- From here, lower the free leg down until your heel taps the floor.
- Maintain control and bring it back to to the starting position.
- Perform 8 reps on each side.

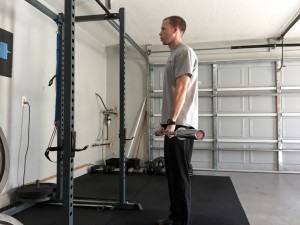
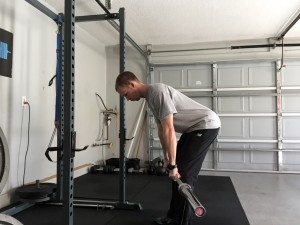
b. Romanian Deadlift
There’s a principle of specificity that states in order to get better at performing a task you need to perform more of that specific task. To improve the hip hinge, we need to do the hip hinge. That’s the simple reasoning behind this exercise.
As you perform the hip hinge pattern with the Romanian Deadlift, it can increase the length of the hamstrings via the eccentric (muscle lengthening) portion of the exercise.
Here’s how to perform it:
- Set up in a squat rack with a bar at mid-thigh height.
- Grab the bar with the hands at about shoulder width. Unrack the bar and step back.
- From here, push your hips back to a wall directly behind you, while folding over at the waist. As you do this, allow the bar to slide down your thighs. You should feel a nice stretch in the back of the thigh if you are doing it correctly.
- Once the bar reaches your knee cap, push your hips forward and return to the starting position. Be sure to keep the back flat and chin tucked here.
- Perform 8-12 reps.
4. Plank
To improve the plank test, the focus needs to be on improving abdominal strength and endurance. The abs function in three planes of movement. These are sagittal (front-to-back), frontal (side-to-side), and transverse (rotational). We need to work the abs in these three planes to improve the plank test.
Here are three exercises you can use.
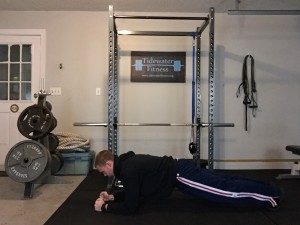
a. Plank
Again, using the principle of specificity, to get better at the plank test you need to do the plank. This exercise works the abdominals in the sagittal plane.
Here’s how to perform it:
- Set up in a traditional plank position with your forearms on the ground.
- Keep the back flat, abs braced, and do not let the hips sag.
- Hold for specific number of breaths (10-12) or seconds (15-30).
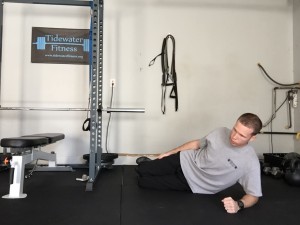
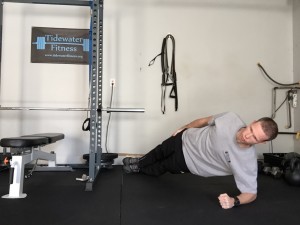
b. Side Bridge
The side bridge is very similar to the plank except you will be performing it on your side. This is an excellent exercise to begin building core strength in the frontal plane.
Here’s how to perform it:
- Lie down on your side with your elbow supported directly under your shoulder and knees bent.
- Press away from the floor using your elbow, extend your legs, and keep your body in a straight line.
- Hold for specific number of breaths (8-10) or seconds (15-30) on each side.
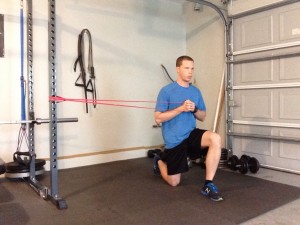
c. 1/2 Kneeling Pallof Press
The 1/2 kneeling pallof press is a little different than the previous two exercises in that you will be off the floor. In the plank and the side bridge, the floor provides stability for you.
In the pallof press though, you have to create stability through your trunk and core on your own. This makes it a great exercise to begin building strength in the rotational plane.
Here’s how to perform it:
- Using a band or a cable, set up in a 1/2 kneeling position with one knee on a pad and the other foot in front of it. The inside knee (one closest to band or cable) will be down on the pad.
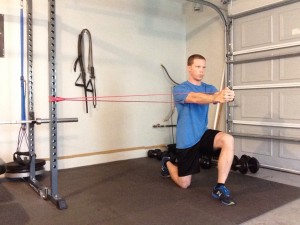
- Starting with the band or cable at your chest, press straight out until you have fully extended your arms. Then exhale.
- Return your arms back to the starting position and repeat.
- Perform 8-10 reps on each side.
Conclusion
That wraps up this series on assessing and improving movement. Enhancing your ability to move is just as important as assessing it. The good news is this can be done with some devoted effort.
The exercises I have presented can be done in a warm up or in the actual workout. Once you have added them into your program, re-measure the assessment tests I gave you in part 1 of this series every 2-4 weeks. You should begin to notice some improvements within this time frame.