An assessment is an often overlooked but rather important part of a strength training program. Everyone has limitations and movement restrictions that can prevent them from performing certain exercises with correct form.
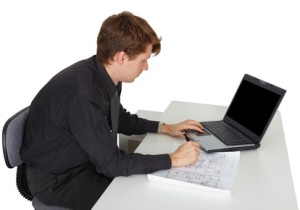
For example, office workers usually have a hard time performing any overhead exercises correctly. Sitting at a desk all day places them into a rounded upper back or kyphotic posture, which can limit the ability to get the arms overhead safely. Add weight to this movement and you have a recipe for injury.
An assessment helps paint a picture of where your body is at currently. It’s the starting point of any effective program.
The problem is the average gym goer doesn’t have access to a qualified professional who can perform an assessment and select exercises based on their findings. Instead, they do what they’ve always done or hop from magazine to magazine in search of the latest program.
But most of these programs are general in nature and don’t take movement limitations into account. This, in turn, sets them up to perform the exercises incorrectly and compromises safety in the long run.
A program that is specific to your goals and needs will undoubtedly be most effective. Since most people will not have the benefit of a professional, the next best thing is a self assessment.
This article is going to be part 1 of a 2 part series. In this post, we will look at 6 basic tests you can use to assess movement and determine appropriate exercises and exercise technique.
You may may find that when you perform these assessments, you have a hard time doing them. That’s ok. Next week, I’ll be back with different ways to improve your movement quality and completion of these tests.
So let’s get started!
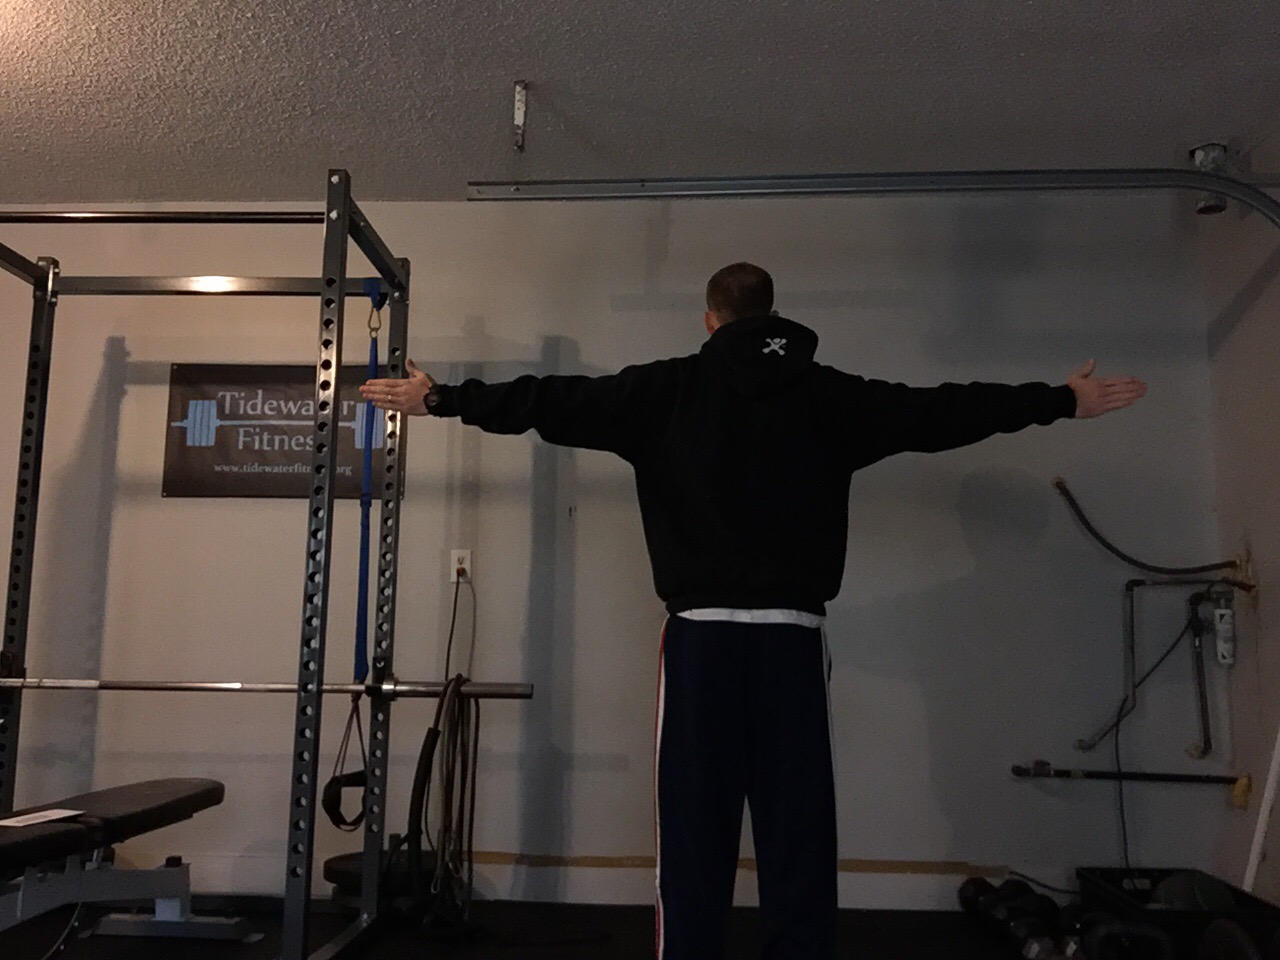
1. Back to Wall Shoulder Flexion (click for video demonstration)
This is an exercise I picked up from Eric Cressey. It’s an easy way to assess if your ready to perform exercises like overhead presses, pull ups, and chin ups.
Here’s how to perform it:
a. Set up against a wall with your feet about 6-8 inches away from the wall.
b. Push your low back into the wall and place your head against the wall.
c. From here, raise your arms overhead until your thumbs touch the wall.
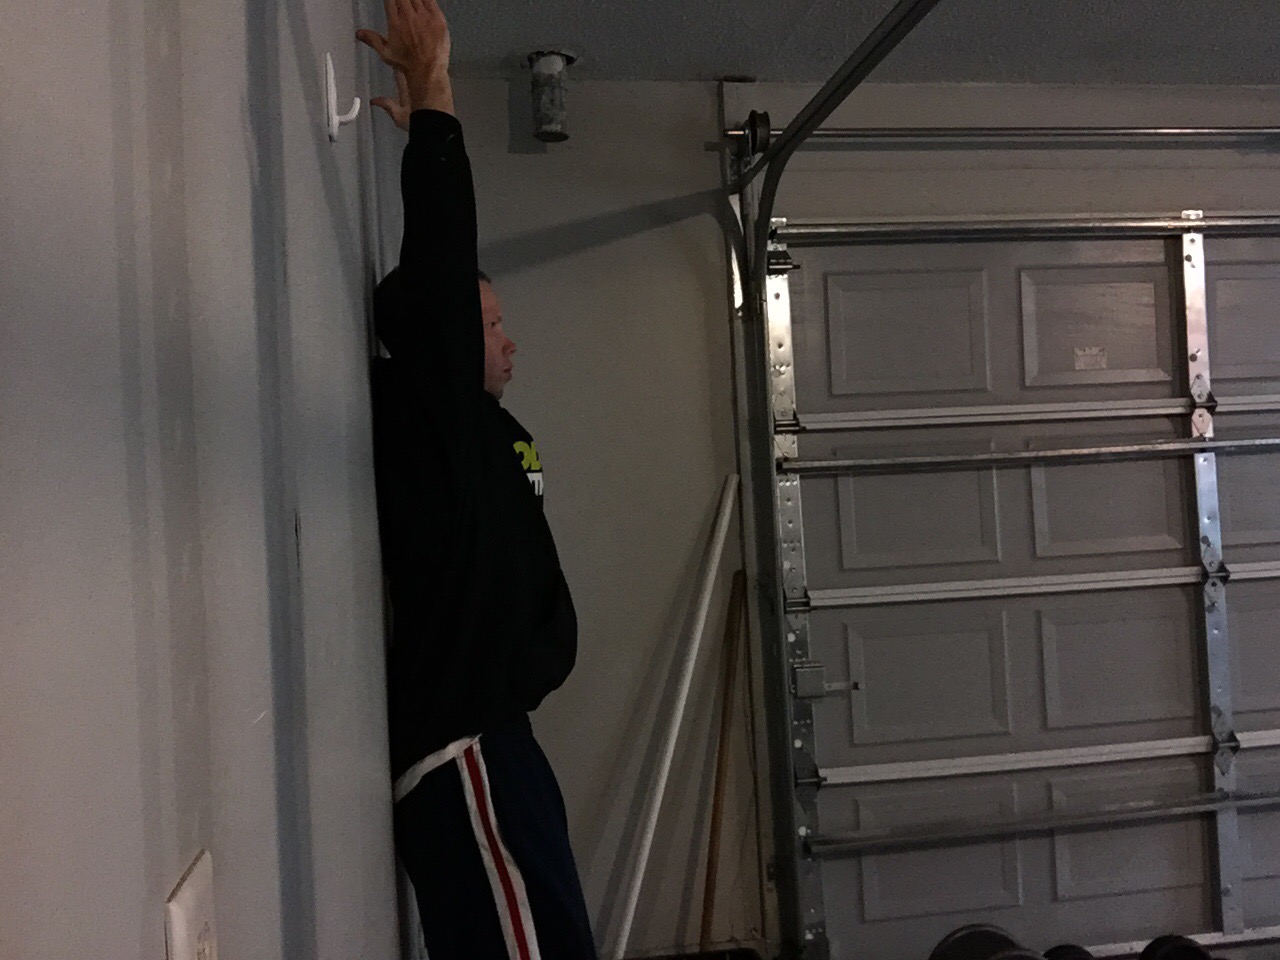
If your low back or head comes off the wall or your elbows bend it’s a fail. If this occurs, it’s best to forget about any overhead exercises for the time being. Focus on horizontal pushing and pulling exercises like push ups and rows.
2. Apley’s Scratch Test (click for video demonstration)
This is another great test for assessing the ability to get your arms overhead safely.
Here’s how to perform it:
a. While keeping a neutral spine, extend your arms out to the side in a cross position.
b. From here, bring one arm overhead and place that hand as far down on the upper back as possible. The other hand comes underneath, at the same time, to the mid back as high as possible. (wherever your hands land is where they land, no walking them closer together)
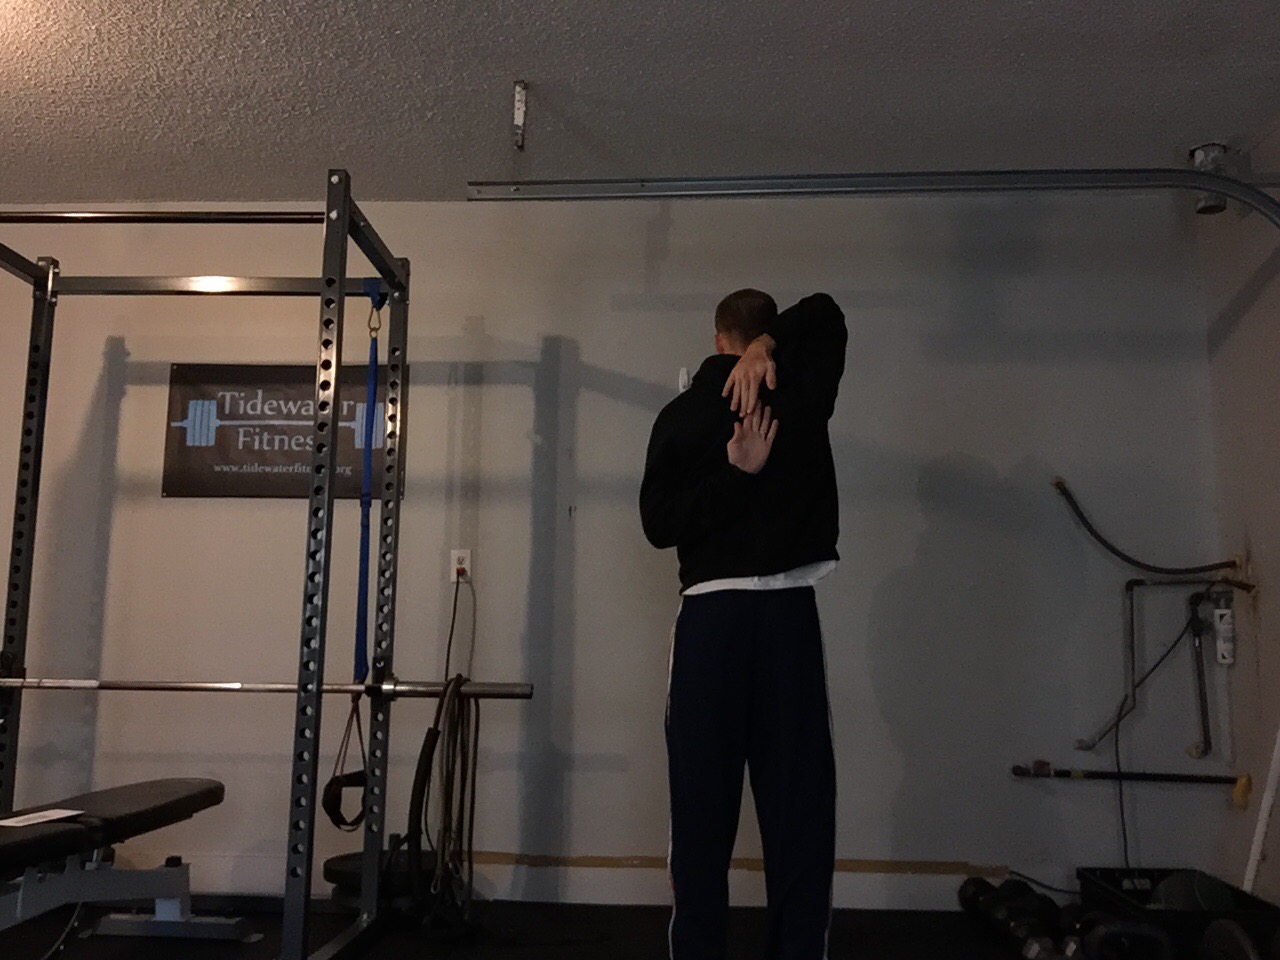
If you can’t get your fingertips to touch or you have to arch your back heavily in order for them to touch, it’s a fail. Again, focus on horizontal pressing and pulling exercises for right now.
3. Quadruped Rock Back (click for video demonstration)
This is a test that assesses your squat depth. One big mistake people make when squatting is trying to get their butt to touch their heels. If you don’t have the capability to go that far, you’re asking for a low back injury.
Here’s how to perform it:
a. Set up in a quadruped position.
b. From here, rock your butt back as far as possible.

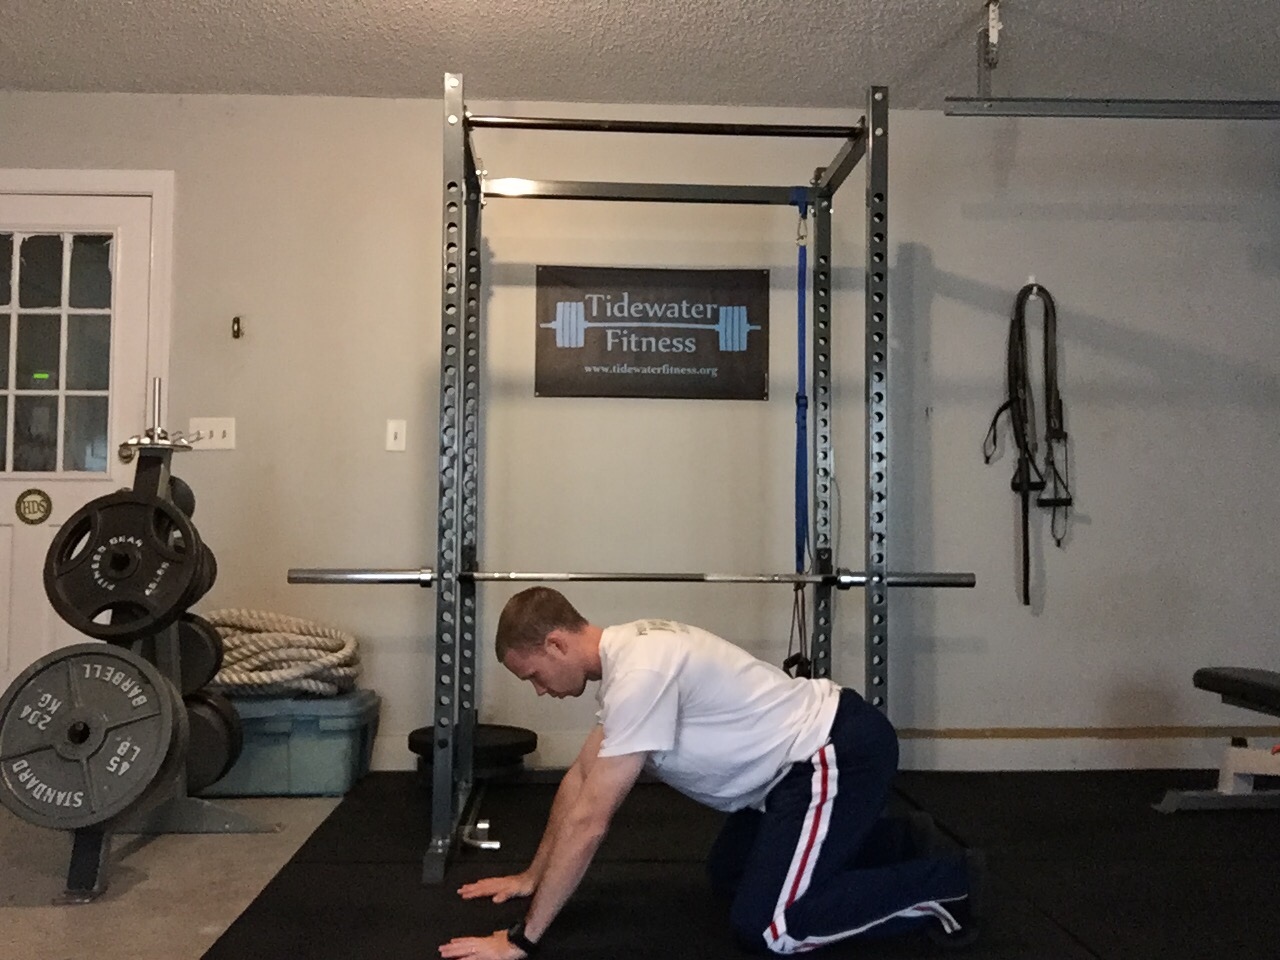
If you look at this exercise from the side, it looks exactly like a squat. It takes gravity out of the equation and simply assesses your squat mobility. The point right before the low back starts to round (also known as butt wink) is the point you want to stop at when performing a squat.
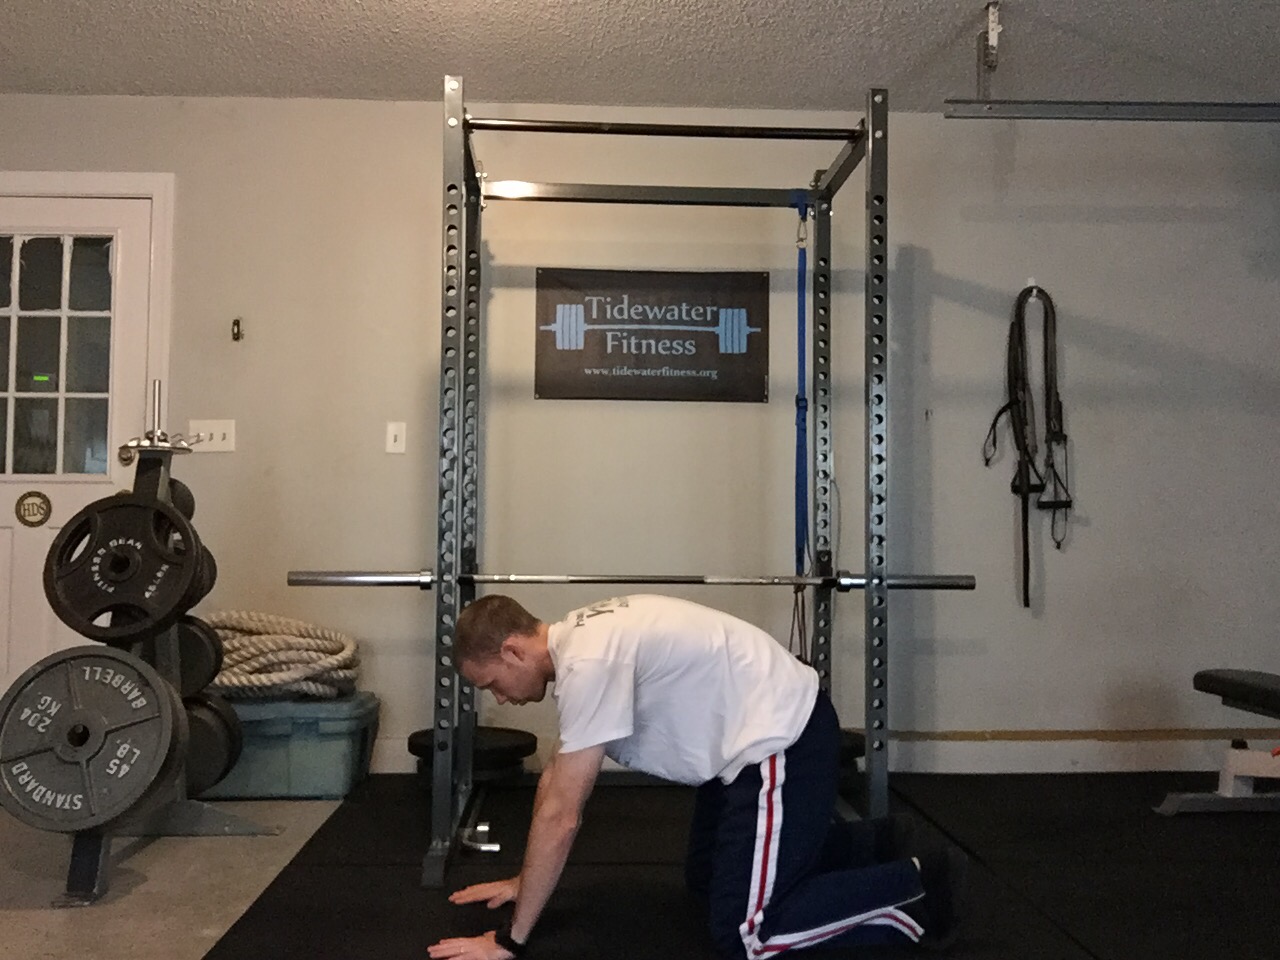
When butt wink occurs during a loaded squat, your lumbar discs are heavily susceptible to injury. If rounding occurs very early in the quadruped rock back test, stick with box squat variations for the time being. This will limit your depth, prevent your low back from rounding, and help you develop a proper squat pattern.
4. Squat Stance
This test assesses what stance is more appropriate for you when squatting. Everyone’s body is different. New research has shown us that people have different femurs (thigh bone), which essentially means everyone will squat differently.
Here’s how to perform it:
a. Set up with your feet about hip width apart and toes pointed straight ahead. Then squat.
b. Next, set up with your feet about shoulder width apart and toes turned out about 20-30 degrees. Then squat again.
c. Finally, set your feet outside shoulder width and toes turned out about 20-30 degrees. Then squat.
Make a note on how each one feels when you perform it. Does it feel smooth or is it choppy? Can you keep your back flat in one position over the other? Do your heels come off the floor? Can you keep your chest up?
You want to pick the position that feels best, and allows you to keep your heels grounded, back flat, and chest up. One of the these will feel better than the other two. Use that position when you squat.
5. Straight Leg Raise (click for video demonstration)
This test looks at the mobility of your hips while maintaining core stability, which is important for deadlifting. It assesses flexibility of the hamstrings and calves while maintaining a neutral pelvis.
Here’s how to perform it:
a. Lie down on your back and have a partner view from the side.
b. Pull your toes back and contract your quads.
c. From here, while keeping one leg on the ground, raise the opposite leg as high as you can while keeping both legs as straight as possible.
d. Have your partner draw a line from the outside of your ankle all the way to the floor.
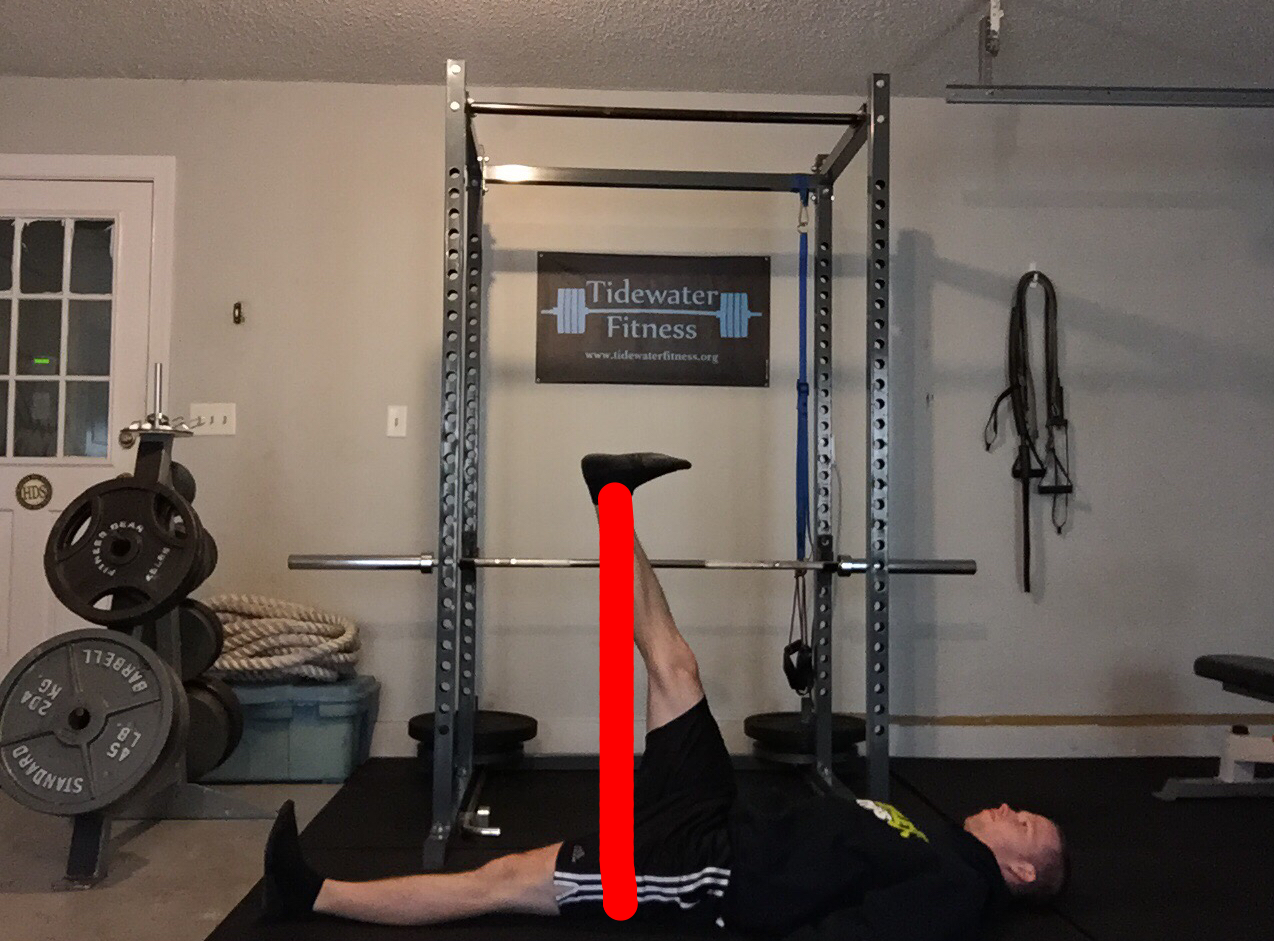
The goal is to have that line pass your kneecap. If the line does not pass or is in line the kneecap, it’s a fail. In this case, do not perform deadlifts from the floor. Be sure to elevate the weight with exercises like rack pulls or block pulls.
This test essentially shows if you have the mobility and control of the hips and pelvis to hinge properly (the foundation of a deadlift). If the outside of your ankle doesn’t cross your kneecap, you would have to compensate in some fashion to deadlift from the floor. This compensation usually occurs at your low back, which would automatically place you in a vulnerable position.
6. Plank
This one’s simple. The plank test is a core strength and endurance assessment.
Here’s how to perform it:
a. Set up in a traditional plank (forearms on the floor) or in a Push Up Position Plank (hands on the floor).
b. Try to hold for 2 minutes.
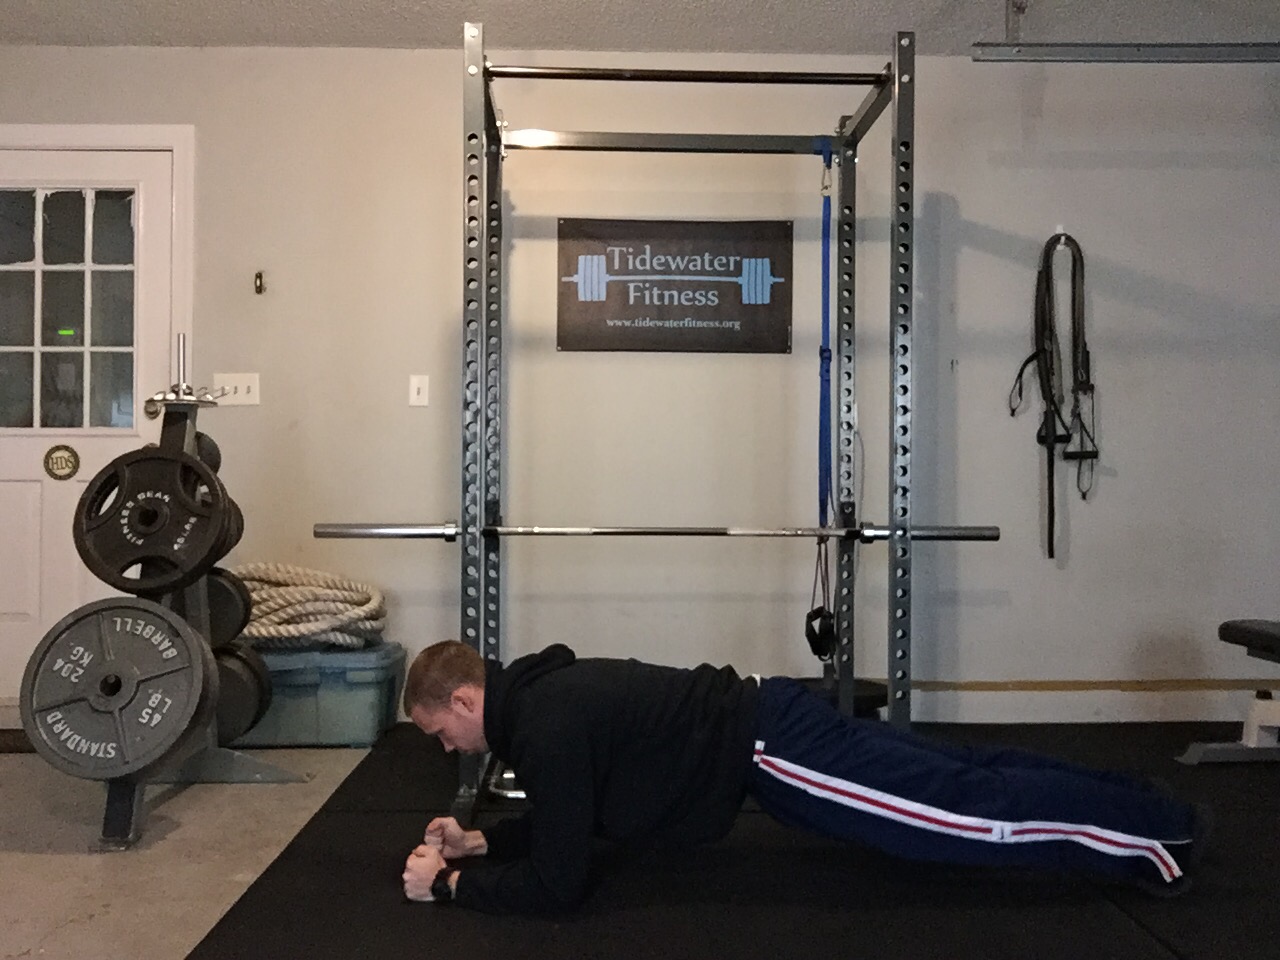
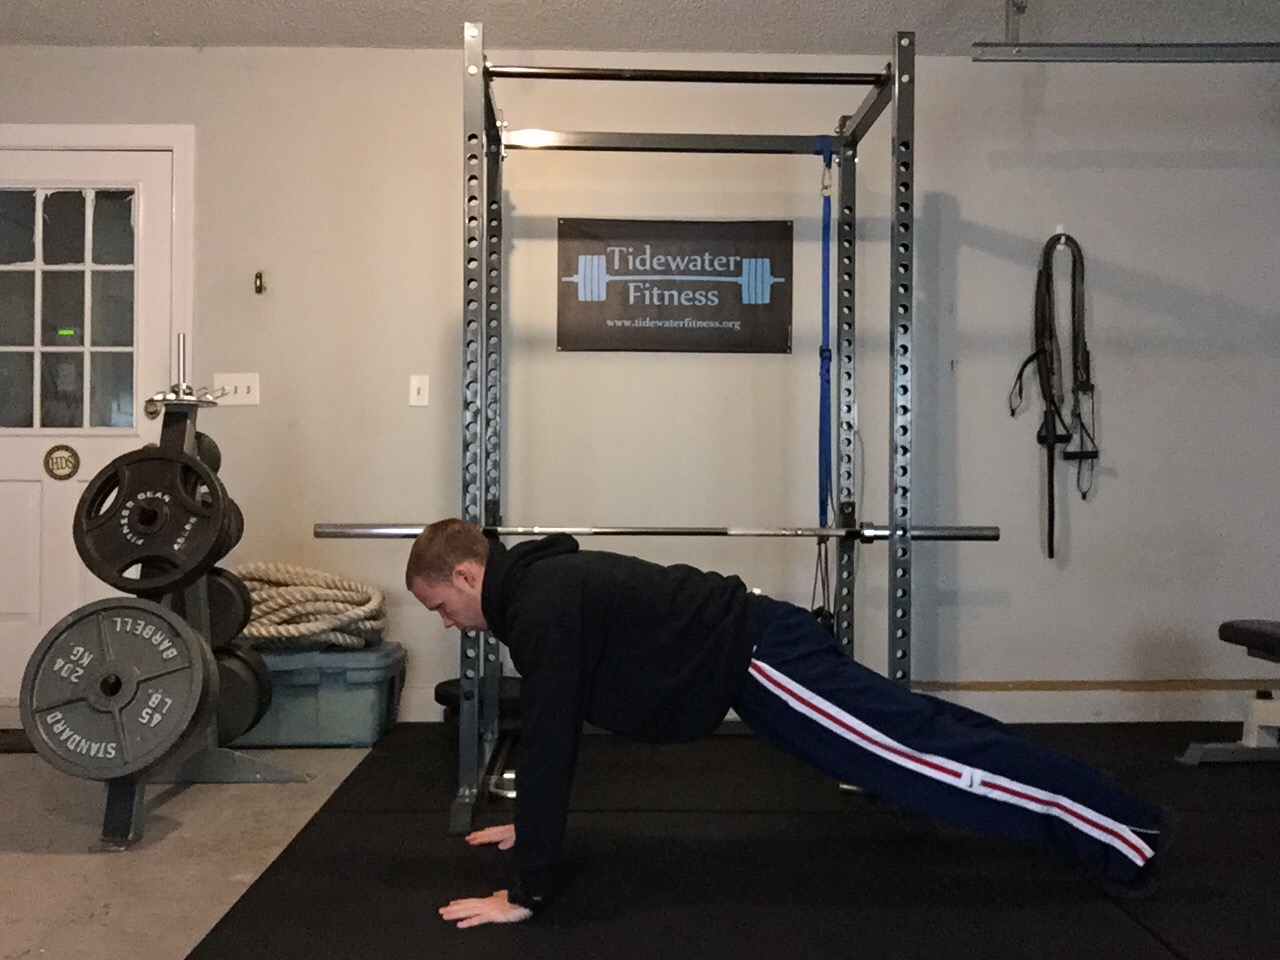
This one may not sound like much, but those 2 minutes will be the longest of your life! If you can hold it for 2 minutes, well done. If not, it’s a fail. This means you would benefit from some more direct core work (like planks and side bridges) and strength training.
Wrapping Up
Everyone’s body is unique. Our jobs and daily posture contribute to movement deficiencies. Like I mentioned before, when you add weight to poor movement patterns good things never occur.
These 6 assessments can be performed in 10 minutes and will give you insight into how your body moves. You can use this information to create a program customized for you.
Next week I’ll be back to give you specific exercises you can use to improve these tests. By improving your ability to move, it opens up your exercise library. You’re able to do more things safely, which means more variety and more fun.
Photo credit:
1. https://www.acefitness.org/blog/3771/posture-and-movement-assessments
2. http://goldtouch.com/split-keyboard-key-avoiding-computer-hunch/
3. http://themovementfix.com/the-best-kept-secret-why-people-have-to-squat-differently/